The GUIDE index for Curse of Strahd and other related articles can be found here !
After the Valley of Barovia was conquered by Strahd’s armies and the construction of Castle Ravenloft began, an archwizard named Khazan was hired to aid on the project. After the castle was complete he retired to the Barovian countryside. He built a tower in an island in Lake Baratok and a bridge to get to it. It is also explained in the chapter’s intro (page 167), that Khazan eventually visited the Amber Temple and acquired lichdom. He later became an advisor for Strahd. Long after that, Khazan tried to achieve demilichdom in order to project his life-force outside of Barovia. He was trying to escape and failed. His body was destroyed and Khazan was no more. Khazan’s bodily remains are buried in crypt number 15 (page 88), his Staff of Power can be retrieved there.
It was only recently that the tower became the base of Rudolf Van Richten. It is from here that he has led his explorations of the valley. Van Richten (Rictavio) is currently relocated in Vallaki. (Unless something happened there that made him escape, many of the outcomes in the Vallaki chapter would result in just that) Wherever Van Richten is found, he is not at the tower when the adventurers arrive, nor is Ezmeralda.
Accessing the tower
The tower has two protective charms. The first one is a Spell Drain ability. The tower has a built-in antimagic field. I extends 5 ft. from it. Magical stuff put there by Khazan inside the tower works as normal, that’s the exception. This is important due to the trap in the front door. Spells like Detect Traps or Knock are useless in this place, players will have to solve the riddle if they want to use that door, no magic.
The second protection is a lightning trap that surrounds the tower if anyone touches the door without solving the riddle first. The lightning surrounds the tower and deals 22 (4d10) damage to the PC who touched the door and any other who is 10 ft. from the tower. This protective shield lasts for 10 minutes. If the adventurers activate this field 3 times the tower collapses on itself and only a pile of ruble remains. If that happens and the PCs were looking for an artifact, they will have to dig for hours if they want a chance to find it. Don’t forget the clay golems will attack if unearthed (10% chance per hour).
However, even “solving” the riddle and doing the arm positions from the picture can result in harm. If done wrong, a young blue dragon appears and attacks. This part would require that the actual arm positions thing is done by someone, so that there is a chance of failing. Do not permit a player to say “ok, my PC does all this in order”. Either the player has to do it in real life, or keep it in game and let them roll a performance check. An appropriate DC would be 14. No automatic success for stating the solution only with words.
There is a back entrance. On the northwest side of the tower, rotting scaffolding hug the wall. This path goes up to a hole in the third floor. It was either put here by Van Richten to access the place, or some years before, by a person who intended to repair the tower unsuccessfully.
Inside the Tower
There is a lift in the first floor operated by four clay statues. They only obey commands related to the operation of the lift, such as: go up, go down, stop, lift this, wait. Any other command is disregarded, and they all defend themselves if attacked.
You can build a fun encounter here, if the PCs accessed through the front door they are probably a bit paranoid about the trap and the antimagic field. When they see the statues, you can count on their paranoid theories and come to the conclusion that this is in fact another trap. When you describe the room, make sure you describe in detail how the statues look and that they are holding the chains. They do not move. If a PC gets closer, describe how the statues get tense for a second holding the chains with more strength, as if they were to pull them all at the same time. This is the statues getting ready to operate the lift, not a menacing gesture in itself. But the PCs will probably flip out and make a mistake (attacking).
Second and third level hold nothing of importance, except the secret access in the third floor.
Van Richten’s room is in the fourth floor. This place is cleaner and shows signs of recent use. There is an animated armor that could be really useful to the PCs if they discover the command word “Khazan”. Other than that, there is a chest with the severed head of a Vistani man. Van Richten has used it with the Speak with Dead spell to get information about the Vistani.
Ezmeralda’s Wagon
This is in my opinion the most fun part of this chapter. The wagon is rigged. If the backdoor (the only visible one) is used to access the wagon, 101 alchemist’s fire flasks explode at the same time !
This causes a blast radius of 30ft with 55 (10d10) damage (there is a save for half, however anyone within 5 ft. gets disadvantage on it). If this happens the wagon is completely destroyed. All this sounds overkill but the party is probably level 5-7 so there is a chance of survival, at least for the toughest or most dexterous characters.
By the way, if it is destroyed, don’t forget to change the location of Van Richten’s journal page to the tower or to Ezmeralda’s possession so the PCs get to read that.
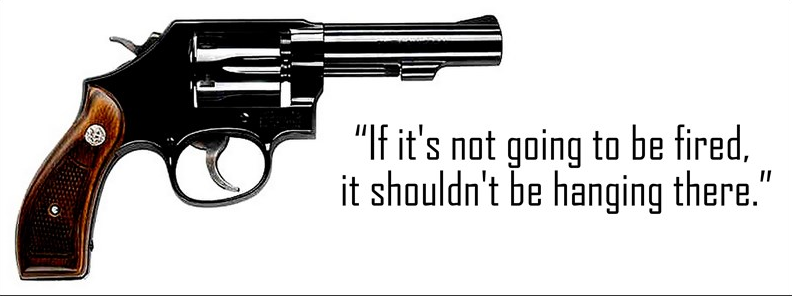
This is what I call the Curse of Strahd Chekhov’s Gun. If you don’t know what Chekhov’s Gun is, it is a dramatic principle that states that every element in a story must be necessary to the story and must ultimately be used. In short words, it means that if a loaded gun is introduced to the story, it is bound to be shot before the story ends.

The wagon is Chekhov’s Gun, it is just too sweet to not be used. It is my advice that this wagon has to blow up sooner or later. If the PCs make it explode then that’s it, and it is possible. If they PCs bypass the trap it’s ok, it can still blow up later. There is an encounter with werewolves that is triggered by the tower protection being activated or destroyed (page 171). If this battle happens outside Van Richten’s tower, this is a perfect chance to have it explode.
It could happen because the PCs use it as a bomb, throwing a Firebolt into it while the werewolves are close, effectively wrecking them. Or a wounded cowardly werewolf might choose to use his turn to hide inside the wagon and regenerate, only to activate the explosion mid-battle.
If Ezmeralda has not met the PCs yet, you can use the other set encounter in page 172. Ezmeralda comes back to hide after fighting with Strahd alone. She is wounded and will be angry if her wagon exploded (as it was bound to). A nice extra is to have Ezmeralda tailed by some other werewolves, undead or vistani assassins, and have a fight where the PCs assist her.
Notice that this event ties Ezmeralda to the adventurers and triggers Strahd to send the dinner invitation letter to the party (only if this has not happened yet).

Previous Chapter — Next Chapter
Make sure you follow the rest of this Curse of Strahd DM Guide
You can now buy the full guide at DM’s guild. It’s formatted in a single PDF document. The PDF has clickable index and it’s got bookmarks ! A printer friendly version is also included.
Thank you for your contribution because it makes my work more rewarding. You’re not paying only for the content here, but also, you are supporting a freelance author and illustrator in the hobby.
I thank you and I hope this guide was useful to you and proved a factor in making your Curse of Strahd game a better experience for you as a DM and also for your players.
You can buy it here
Writing these DM guides is time consuming, my website is funded through Patreon, It is thanks to people who like my work that I am able to continue mapping and providing RPG original experiences to people all over the world. If you like what I do, consider getting involved and backing me. What you get is impressive hi-def versions of my maps to be used in your RPG games (these have lower resolution), and the satisfaction of helping the rpg community grow bigger and stronger. Help me get funding and enjoy hi resolution version of all my work.
Did you like this guide? Consider liking our Facebook page.
All the maps in this website are registered under the Creative Commons License Attribution-NonCommercial CC BY-NC. What this means is that anyone can use them, share them or modify them. They cannot be used commercially. And finally, credit must be given to me (Derek Ruiz) as the author, and a link to this web page must be included if it is shared or redistributed.


