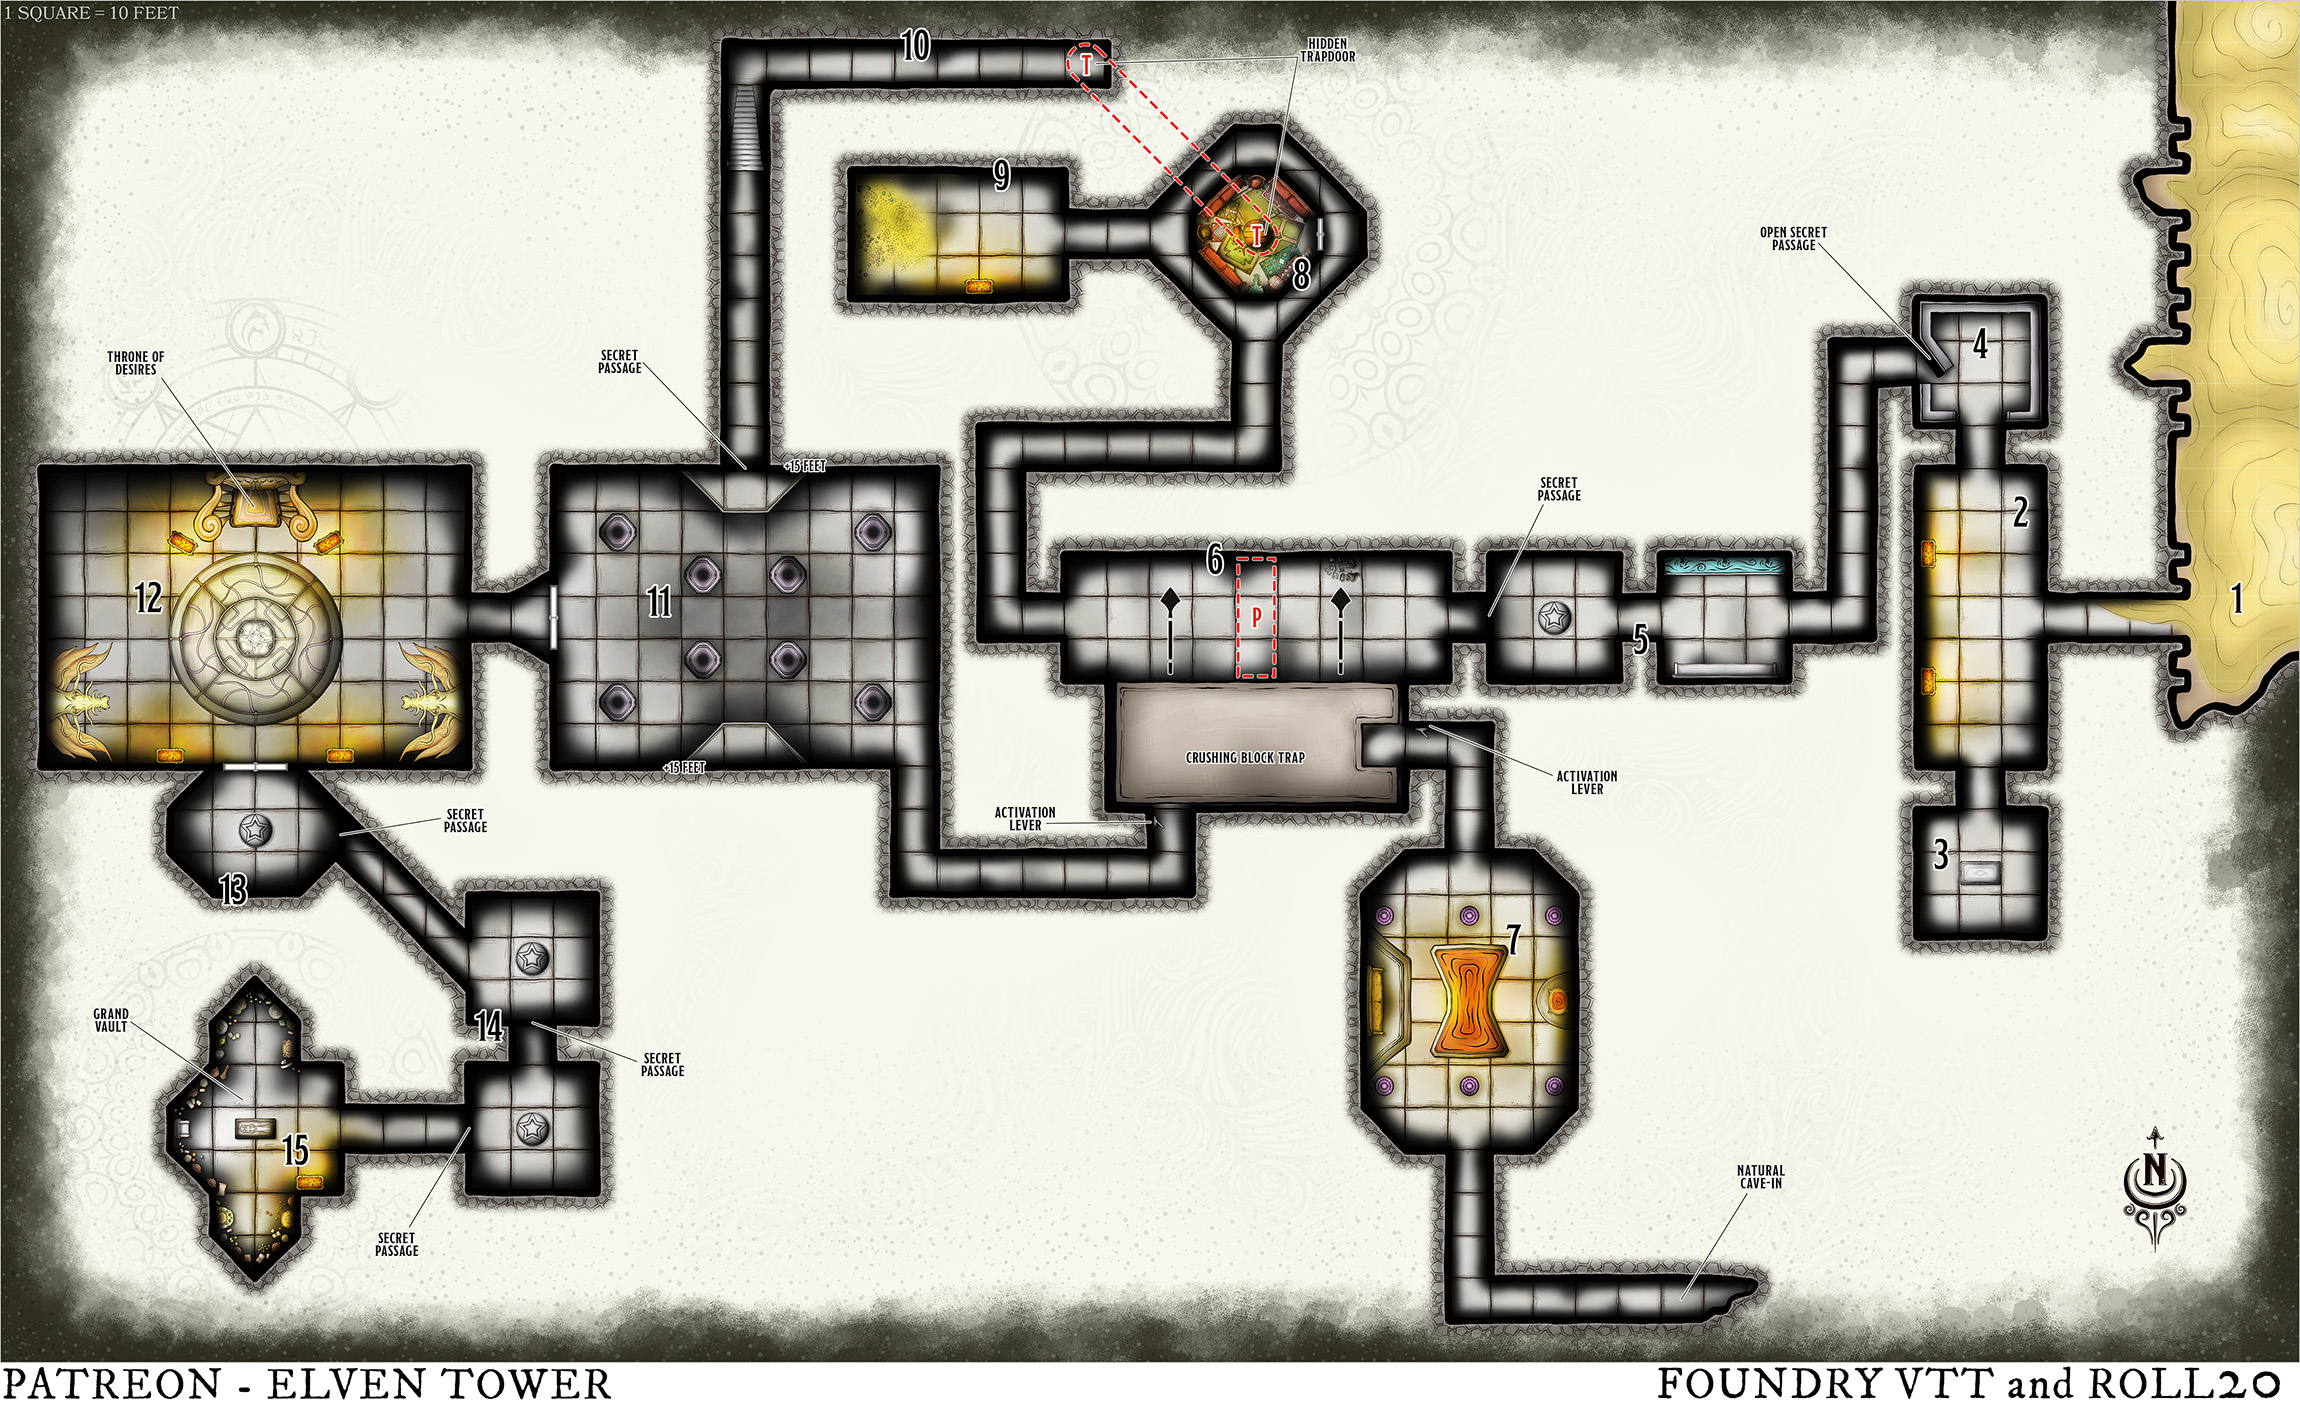
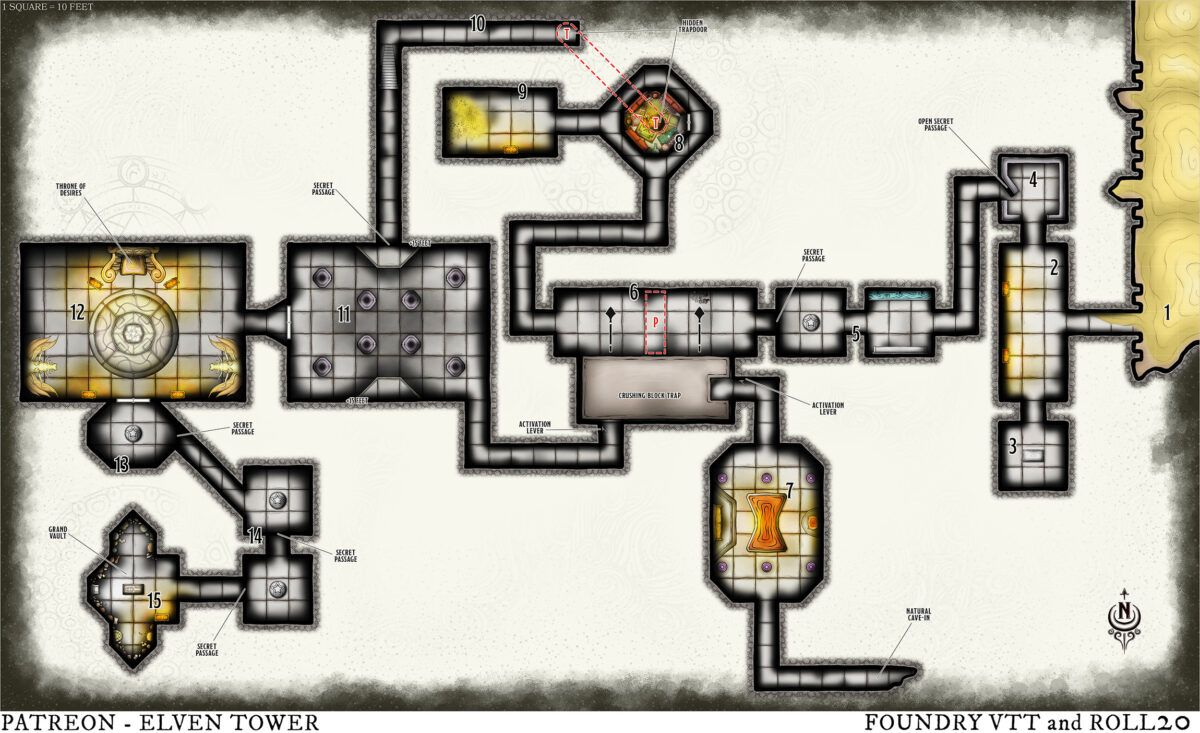
Our Silver Coin tier on Patreon grants access to this adventure and the maps within it, along with 50+ other one-shots, and our map catalog of 900+ maps. You can also purchase this adventure individually in drivethruRPG. This is a sample version of the adventure section that features map 915 Throne of Desires.
“The worst part of this trip is behind us. This place is old and abandoned. Whatever lurks here must be old and decrepit; we can handle such things…”
Sir Rankhler Yellowleaf
Random Events
|
d6 |
Details |
|
1 |
Four wights wearing dull iron crowns approach. These are the embodied spirits of hapless men who once were Cursed Regents. Even after passing on the position, they are still bound in the dungeon. |
|
2 |
Two portcullises fall. They are 15 feet apart. Their position may separate the party. Narrow orifices blow a cloud of noxious gas into the blocked area. It deals 6d6 Poison damage (DC 15 Constitution save / half). |
|
3 |
A vivid vision assails all present. The characters witness a warrior slaying a crowned abomination. After the grueling fight, the warrior sits on a gilded throne. He becomes an undead monster after this. |
|
4 |
As the characters explore a hallway, hundreds of bones start raining from orifices in the ceiling. The bones clatter, vibrate, and coalesce into twelve skeletons wielding femurs as clubs. They attack at once. |
|
5 |
A section of the wall collapses inward, revealing a black, bubbling goo behind it. If a creature comes within 10 feet of it, the amorphous monster charges toward it. This is a ravenous black pudding. |
|
6 |
A random party member steps on a pitfall trap and falls 10 feet into a hole filled with a swarm of venomous snakes (DC 20 Dexterity save). The swarm has Advantage on attacks versus targets in the pit. |
The place known as the Abode of the Cursed Regent was once a larger location. It was magically sunk into the sands of the Chakhren Desert, and the erosion of the area has slowly taken more and more of it. While still large, it is a shadow of what it once was. What remains is little more than a direct path from an alternate entrance to the opulent throne room of the Cursed Regent.
Level 5 Dungeon
Events. Each time the characters visit a new area, there is a 3-in-6 chance of a Dungeon Event.
Uncanny Aid. Once per encounter, the Tome of the Regent can confer Heroic Inspiration to whoever needs it the most. It wants the heroes to succeed and reach the throne room (area 12).
The Calling. Entering the dungeon, all characters feel a power-promising mind call. This weaker form of the Tome of the Regent’s manipulation causes the weak-minded to become curious about the throne (DC 12 Charisma check). On a success, they are aware of the mind-altering ploy.
1. Desert Surroundings
A large, eroded, pillared entrance is carved on the stone side of a rocky mesa. The desert dunes touch the threshold. It is safe to set up camp in this area to rest. Desert dwellers do not dare approach the forlorn dungeon entrance.
2. Antechamber
This large chamber contains two roaring braziers. Their light dances on intricate carvings and frescoes on the granite walls.
Braziers. The ornate vessels are made of brass and imbued with a Continual Flame spell.
Art. The imagery on the walls depicts a powerful, robed ruler who wielded magic like a whip. Hosts of faceless men follow his commands. Spellcasters who inspect these images identify the accompanying runes as those of necromancy. The multitudes following the king are undead.
3. The Endless Pit
A 10-foot-long, stone lid rests in the middle of this chamber. It is marked with Draconic runes that say this is an access point to the Underdark.
Shaft. If the lid is removed, a dark shaft is revealed. It is a sheer drop of 2,000 feet that leads directly to a cavernous network. Princess Jirinna says: “My associates are going to love this. We could all just fly down there and explore it…”
4. The False Praying Room
The original dungeon entrance is buried and destroyed; the only access to the throne room for centuries has been the secret door in this backroom. Stone seats surround the walls of the room. The engravings on the floor and walls mark the place as a praying chamber for the god Ord.
Passage. The secret passage that connects this chamber to area 5 was opened a long time ago. The movable wall was left ajar since then.
5. Effigy of King Yaroul
A 20-foot-tall effigy of an armored king stands ominously in the center of the chamber. It appears to look down on anyone before it.
The Tome of the Regent remarks: “King Yaroul was once the ruler of all mortals, what a time…”
Secret Path. The slidable wall has been open many times in the past; it is easy to see its outline (DC 10 Perception). Sir Rankhler sees it too.
6. Crushing Bock Chamber
The chamber features a deadly trap (see map). The crushed bones of a past visitor lie crumpled next to the north wall (DC 12 Perception). A large granite block slides northward and crushes everything when a creature stands on the 30-foot-long pressure plate (DC 18 Perception to notice it).
Block Trap. Once activated, the block quickly moves toward the north wall. Creatures must jump out of its path at once. It deals 8d8 Bludgeoning damage (DC 18 Dexterity save / half). The trap resets after 1 minute.
Paths. Staying on the east side reveals an alcove in the block that can be used to reach area 7. The activation levers there can be used to activate or stop the block, to reach area 11 (see map).
7. Chamber of Fire
An hourglass-shaped pond contains liquid fire. A Detect Magic spell reveals that the container is linked to the Elemental Plane of Fire.
Fire. A spellcaster can collect the liquid fire in a glass vial to create a throwable item. It deals 3d6 Fire damage in a 5-foot emanation.
8. Chamber of the Concubine
A mysterious fey nymph named Adhiara inhabits this opulent room. Once a concubine of King Yaroul, she has forgotten much about her past. She invites the characters to drink and eat.
The Cube. A metal cube on the central table is imbued with a permanent version of the Sympathy spell (DC 16 Wisdom save). The spell has kept the nymph Adhiara here for centuries.
Secret Path. A trapdoor under the rugs reveals a path to area 10 (DC 12 Perception).
9. False Vault
The room contains a literal mountain of gold and silver pieces. They glimmer in the brazier’s light.
Trap. The hoard is an illusion (DC 14 Wisdom). If a creature touches it, that triggers a Glyph of Warding (explosive rune, DC 16 Dexterity save).
10. North Passage
This hidden passage can be used to reach area 11 if the characters cannot figure out the alternate exit behind the crushing block in area 6.
11. Chamber of Failed Regents
Eight wide pillars carry the tall dome ceiling of this chamber. Strange shadows move from pillar to pillar with an ominous, slow gait.
Guardians. Six wights, the remains of past regents who once sat on the throne, roam this chamber. Their eroded skulls are deformed under the squeezing grip of dull iron crowns.
Treasure. Each wight has a dagger engraved with the words ‘For the King’. They disable the Cursed Regent’s Regeneration (see statblock).
12. Chamber of Effigies
The fabled, gilded Throne of Desires lies ahead. A decrepit, humpbacked, crowned man sits upon it. It regards you with unmistakable disdain while the Tome of the Regent laughs…
The Cursed Regent sees any visitors as competition for the throne. He stands, casting Fly at the beginning of the fight to keep himself away from melee combatants’ range. Eight shadows detach from the walls to aid the failed lich fight.
The Knight. Sir Rankhler Yellowleaf, bolstered by the Tome of the Regent’s unending influence, is ready to fight to the death to sit on the gilded throne. He cannot escape this urge.
The Scholar. Princess Jirinna has two Scrolls of Counterspell. She takes a support role during this fight and attempts to time her scrolls well. Alas, two of the shadows target her in the fight.
A New Regent. When the Cursed Regent is defeated, Sir Rankhler immediately moves to sit on the throne. If he succeeds, his body is surrounded in an eldritch cocoon for 1 day. After this period, he emerges as a Cursed Regent (see Conclusion).
13. Chamber of Vanity
The room contains a regal effigy of King Yaroul surrounded by intricate paintings of him being worshiped, leading hosts of undead armies, and instilling fear on all who gaze at him.
Secret Path. A movable wall reveals an eastbound path to area 13 (DC 14 Perception).
14. False Vaults
Two contiguous chambers separated by a hidden passage contain replicas of the statue in area 13. These statues have gold inlays and embedded gemstones. They are worth 500 GP each.
Secret Path. A movable wall reveals a westbound path to area 15 (DC 14 Perception).
15. King Yaroul’s Grand Vault
The chamber contains an assortment of coinage, art objects, weaponry, and magical trinkets.
Treasure. In the room, there are 700 GP, 1,600 SP, two Potions of Healing, one Potion of Vitality, a +2 Dagger, a set of Mithral Chainmail armor, and two journals, which Jirinna claims.